I’ve been running Plex as my media server for some years now, and it’s great. The one thing I’ve always wanted to get around to doing, was seeing if there was a way that I could get my Insteon SwitchLincs to respond to specific actions within Plex. For example, dim the lights to 15% when a movie is started, and ramp them back up when the movie is paused or stopped. There’s no way to do that within the Plex server, but using the 3rd party application PlexPy gives you this exact capability!
PlexPy is a Plex monitoring program that watches the Plex server, and logs things like new media added, who is watching what, top movies watched, etc. It’s very feature rich including graphs and charts on all of the information that it collects. It can also send different types of notifications out based on certain events. For example, whenever the next episode of the Walking Dead is added to Plex, PlexPy sends me a notification via PushBullet, and posts the information to a Facebook group where my friends and family can see what is new. It also supports notifications via Scripts, which is where the lighting control for Insteon and LIFX comes into play. Using the Insteon and LIFX API’s, I was able to create a shell script to control the lights based on Playing, Pausing, and Stopping any Movie or TV show.
- Plex is running on a NetGear ReadyNAS, which runs Debian.
- PlexPy is also running on the ReadyNAS
- Insteon hub 2245
- In wall SwitchLinc Dimmers controlling two can lights.
- LIFX A19 LED Bulb
Download & Install PlexPy
As you can see, my Plex & PlexPy setup is running the Debian flavor of Linux. If you’re running on another OS, then the scripts I provide here will not work. You’ll need to create them in a format that your OS knows, like PowerShell on Windows.
Obviously, I’m assuming that you already have Plex up and running. If you do, then proceed to GitHub and install the version of PlexPy for your OS. Installation instructions are provided on the site.
Build the Scripts
Since I’m controlling Insteon and LIFX devices I need to construct the calls for each, and place them in the shell script.
Insteon
The commands for controlling the SwitchLinc’s will look similar to this:
curl -u Username:Password http://xxx.xxx.xxx.xxx:Port/3?0263295d280F1126=I=3/
The above command will dim the lights to 15% connected to my SwitchLinc’s. The easiest way to build this curl command is to use the INSTEON Hub HTTP Command Generator from SmartHome AU. I’ve wrote a previous article on how to use it, if you need some instruction.
Once you have your curl command, you should test it from the bash prompt to ensure it behaves as expected, before using it in the script.
LIFX
The command for controlling the LIFX bulb will look similar to this:
 curl -X PUT "https://api.lifx.com/v1/lights/all/state" \
  -H "Authorization: Bearer API_TOKEN" \
  -d "all" \
  -d "brightness=.20" \
  -d "duration=5"
See the LIFX Developer site for these and other options.
The above command dim the LIFX bulb to 20% over a 5 second period. Since I only have one bulb, I just used the ‘all’ Selector. This will cover any additional bulbs that I may add in the future without needing to change my script. You can however choose specific bulbs. The only item that you need to replace in the above block of code is the API_TOKEN. That token will be specific to your LIFX cloud account, and therefore your bulbs.
To acquire your token, login to https://cloud.lifx.com/, click your username in the top right, then Settings, then Generate New Token. Copy and paste the token, and keep in a safe place. Use that token in the code above, and test from the bash prompt as you did for the Insteon command.
Build the Script
Now that you have the commands put together, and tested from the bash, copy them into a script file.
#!/bin/sh

curl -u Username:Password http://xxx.xxx.xxx.xxx:Port/3?0263295d280F1126=I=3/

 curl -X PUT "https://api.lifx.com/v1/lights/all/state" \
 -H "Authorization: Bearer API_TOKEN" \
 -d "all" \
 -d "brightness=.20" \
 -d "duration=5"
Create a directory on the PlexPy server, Debian in my case, to store the script. I created one named /apps/MyScripts/, and named the file LightsDown.sh. Before you try to use the script in PlexPy, test it from the bash. If it runs as performs as expected, you’re ready.
Note: If you wrote the script on a Windows machine, you may have issues running it on Linux due to the different type of formatting the two OS’s use. If that happens, run the following against the script, and try again:
sed -i -e 's/\r$//' LightsDown http://levitrakamagra.com/.sh
One more thing before moving on to the PlexPy configuration, and that’s to set rights to execute the script from within PlexPy. 755 should suffice here.
Configuring PlexPy to use the Script
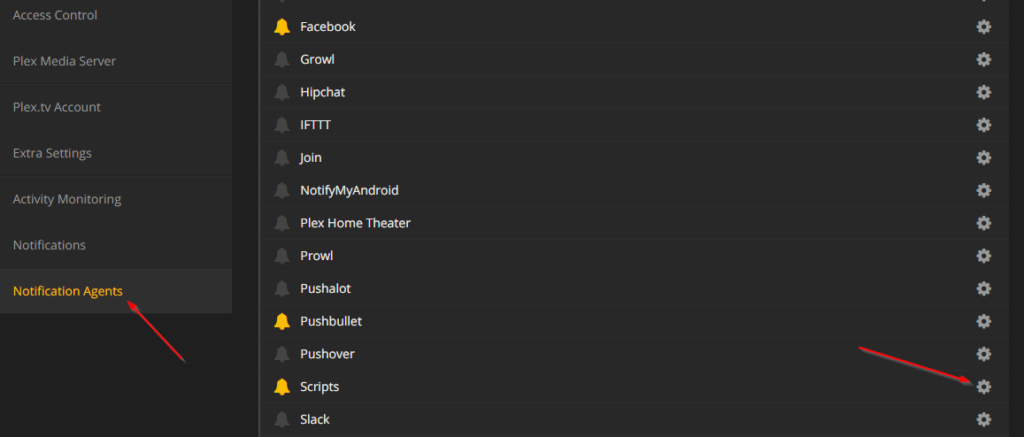
Now that we have our script written and tested, we’re ready to tell PleyPy when to run it. Fire up PlexPy, click Settings, Notification Agents, and the gear icon to the right of the Scripts agent.
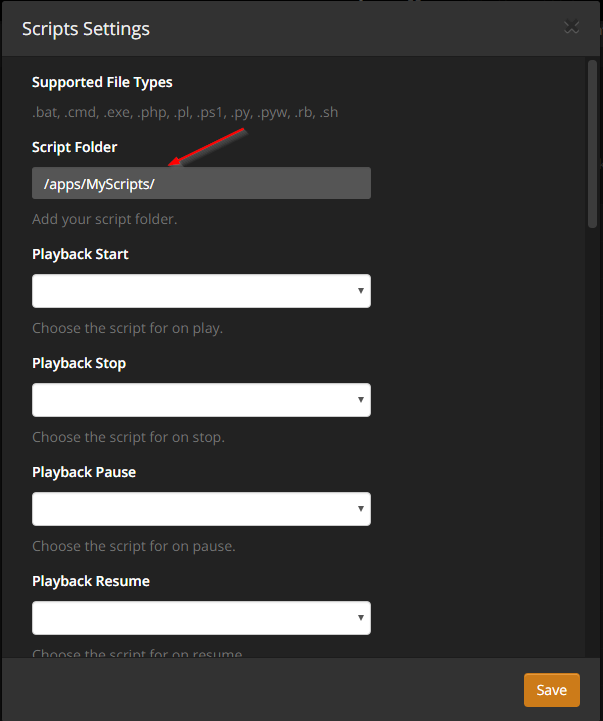
In the next screen, specify the the folder where you saved the script. In my example it was /apps/MyScripts, and click Save.
Now let’s test the script within PlexPy, before assigning the events that should run it. Scroll down to the bottom of the Script Settings window, select your script from the Script pull down, and click Test Scripts. Watch in the lower right corner of the screen for the confirmation.
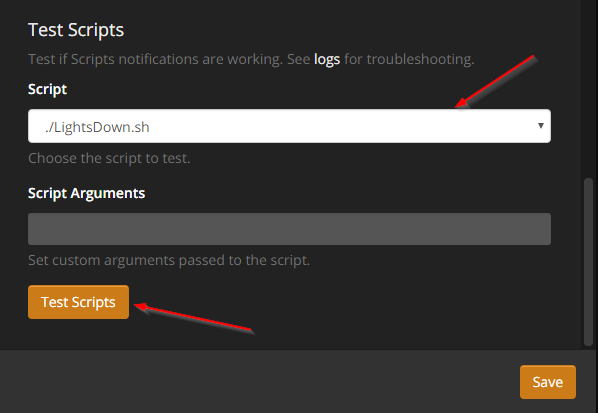
If all went well the lights should have dimmed. If it failed, you can check the logs as stated in the above screenshot.
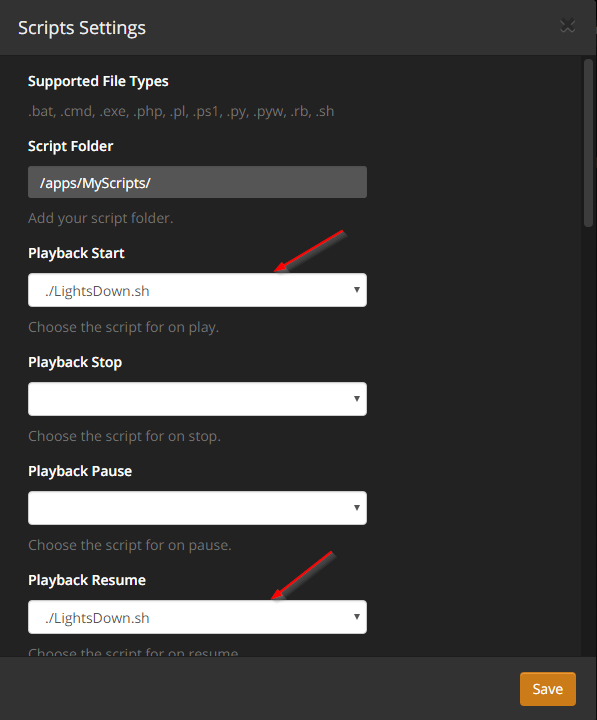
Scroll back up in the Script Settings window, and set the events that will run the script. Since this script dims the lights, I wanted it to run when playback starts or is resumed. Click the Save button and close the window after you have made your selections.
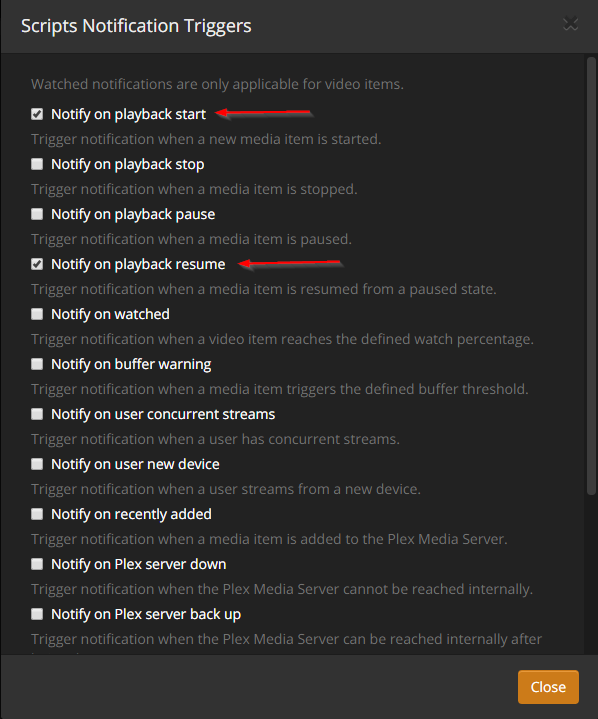
One more step, and then you’re ready for the real world test. Click the bell icon next to the Scripts agent, and match the selections that you made in the Scripts Settings window by choosing the relative triggers. In this example that would be ‘Notify on playback start’ and Notify on playback resume’. Click Close once complete.
Watch the Magic!
Now that you’ve configured PlexPy to run the script when a movie starts and resumes, go ahead and test it. Crank up the lights to full brightness that you referenced in the script, an start a movie or TV show. Within 60 seconds, you lights should dim down to the specified levels. Wait! 60 seconds?! I can hear you saying you want this to happen immediately. Well calm down, there’s a way to do that too, although it’s an experimental feature of PlexPy right now. It has however been working perfectly for me so far.
Set the Script to run Immediately.
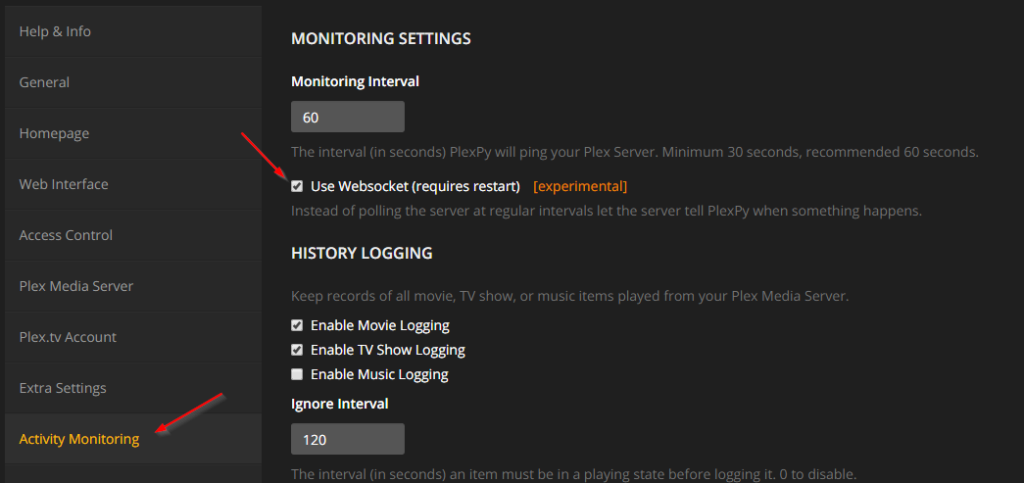
By default PlexPy monitors Plex every 60 seconds, and the lowest you can take this setting down to is 30 seconds. That’s still not fast enough for what we’re trying to accomplish. We can tell PlexPy to use Websocket to let Plex tells PlexPy when something occurs vs. polling Plex every XX seconds. From the setting page, click Activity Monitor and tick the box marked Use Websocket (requires restart) [experimental]. Click Save when finished.
Once the PlexPy server restarts, ramp up your lights, and try again. This time the bulbs should dim close to immediately.
Now all you need to do is follow the procedure a second time, creating a script to ramp the lights back up when the media is paused or stopped.
Restricting to Only One Player
If you have multiple players watching media from your Plex server, then the above configuration will drive you nuts. Imagine you’re sitting in the family room watching TV, and one of your friends that has access to your library starts watching something. Yep! The script will run and your lights will dim. To get around this PlexPy allows the use of parameters that you can check against within your script.
I choose to check for the local IP address in my script. I’ve setup my TV, in the room with the lights, with a static IP address, and check for that IP within my script so it only runs when something is being watched from that player. If another user starts a movie from any other device internal or external to the network, the lights will not dim.
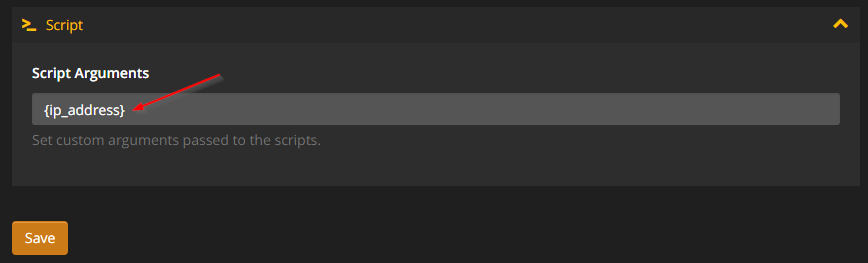
First you have to tell PlexPy which parameter to pass. From the Settings page, click Notifications, and scroll down to the bottom of the page and click the down arrow to the right of >Script. Enter {ip_address} and click Save.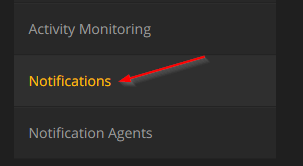
Now we simply modify the script to check if {ip_address} is equal to the IP address of the TV. If it is, then dim the lights. If it isn’t, then do nothing.
#!/bin/sh

if [ $1 = "172.16.4.46" ]
then
 curl -u Username:Password http://xx.xx.xx.xx:PORT/3?0263256d280F1126=I=3/
 curl -X PUT "https://api.lifx.com/v1/lights/all/state" \
 -H "Authorization: Bearer API_TOKEN" \
 -d "all" \
 -d "brightness=.20" \
 -d "duration=5"
fi
Upload the modified script to your server, and run through the tests again. The script should now only dim the lights for the device specified.
Nice script. While reading I was thinking what about multiple device in my house, that’s not going to work. Then the last section just sums it up. Great work!